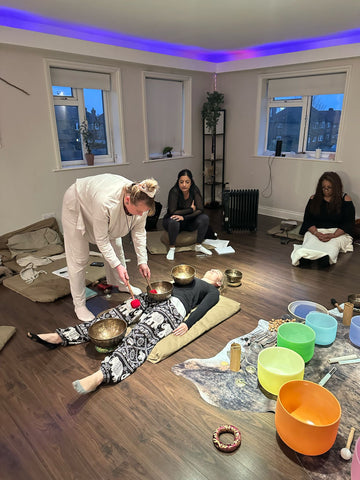
In this guide, we’ll walk you through how to create your own sound healing space at home and the essential tools you’ll need to make it truly effective.
Why Create a Sound Healing Sanctuary at Home?
A sound healing sanctuary isn’t just about having the right tools; it’s about crafting a space where you can retreat from the noise of everyday life and immerse yourself in soothing, therapeutic sounds. Whether you’re dealing with stress, anxiety, or simply want to deepen your meditation practice, a dedicated space for sound healing can make a world of difference.
By creating a sanctuary at home, you can:
• Engage in regular self-care sessions without needing to travel
• Tailor the experience to your personal preferences and needs
• Integrate sound healing seamlessly into your daily routine
Step 1: Choosing the Right Space
The first step in creating your sound healing sanctuary is selecting a space where you feel safe, calm, and uninterrupted. You don’t need a large area; even a small corner of a room can work as long as it’s peaceful.
Tips for selecting your space:
• Quiet and Secluded: Choose a space that is free from distractions and external noise. The quieter, the better.
• Comfortable: Whether it’s a corner of your bedroom, a meditation room, or even an outdoor spot, make sure it’s comfortable and cozy.
• Natural Light (Optional): If possible, choose a space with natural light to enhance the sense of calm, but soft, warm indoor lighting can work well too.
• Ventilation: A well-ventilated area will keep the energy flowing and fresh.
Step 2: The Essential Tools for Sound Healing at Home
Once you’ve chosen your sanctuary space, it’s time to gather the essential tools. These instruments will be the heart of your practice, each offering unique healing properties.
1. Singing Bowls
• Why You Need It: Singing bowls are one of the most widely used tools in sound healing due to their rich, resonant tones that create a deep sense of relaxation. Both metal and crystal singing bowls are excellent choices for harmonizing energy and creating meditative soundscapes.
• Choosing the Right Bowl: For beginners, start with one bowl tuned to a frequency that aligns with your personal healing goals, such as a bowl tuned to the heart chakra (F note) for emotional healing.
2. Tuning Forks
• Why You Need It: Tuning forks are perfect for precise sound healing. They vibrate at specific frequencies that can help balance chakras and clear blockages in your energy field.
• How to Use: Simply strike the tuning fork and place it near or on the body to feel the vibrations resonate through your energy centers. Popular frequencies include 432Hz for overall healing and 528Hz for DNA repair.
3. Gongs
• Why You Need It: Gongs produce powerful, multi-layered sound waves that can penetrate deep into the body, offering profound healing effects. While they may require more space, their reverberations create a full-body listening experience.
• Ideal for: Deep meditative sessions and releasing tension.
4. Chimes
• Why You Need It: Chimes provide a gentle, uplifting sound that can be used to clear energy or end a healing session. Wind chimes or handheld chimes both work well.
• Best Use: Use chimes to set the tone before a session or to clear the space after healing work.
5. Drums (Optional) although I love a shamanic drum!
• Why You Need It: Drumming in sound healing helps to ground the body and release built-up stress. Instruments like frame drums or ocean drums can provide gentle, rhythmic beats that are calming and centering.
• Use for: Grounding and rhythm-based sound meditations.
Step 3: Creating the Atmosphere
The atmosphere of your sound healing sanctuary plays a huge role in the effectiveness of your practice. Here are a few tips to help set the perfect mood:
• Cushions and Mats: Comfort is key, so use soft cushions or yoga mats to sit on. You’ll be spending a lot of time in stillness, so ensure you’re physically comfortable.
• Lighting: Opt for soft, dim lighting. Candles, salt lamps, or string lights can provide a warm, soothing glow. Avoid harsh overhead lights that disrupt the atmosphere.
• Aromatherapy: Scent is a powerful tool in creating a relaxing environment. Consider using essential oils or incense to promote relaxation and enhance your healing sessions. Scents like lavender, frankincense, or sage are ideal for calming the mind.
• Crystals (Optional): Crystals like clear quartz, amethyst, or selenite can amplify the energy of your space. Place them around your instruments or use them in your healing sessions.
Step 4: Establish a Ritual
Consistency is important when it comes to sound healing, so establishing a ritual can help you get the most out of your sanctuary. Here are a few ideas:
• Set an Intention: Before each session, take a moment to set an intention for your practice. Whether it’s relaxation, clarity, or emotional release, focus on your desired outcome.
• Practice Regularly: Commit to a regular schedule, whether it’s 10 minutes daily or an hour every week. This helps you build a deep connection with your sound healing tools.


